
Pendants are one of my favorite kinds of necklaces because that dangling pop of jewelry is dramatic and fun; the length also handily draws your eyes down the entirety of the outfit and won’t crowd your face/neckline.
Luckily for us, pendants are also the easiest kind of necklace to DIY, because you can pop a few beads and baubles together, slip it on a chain you already own, and BAM! You’re ready to go. That same chain can be used to showcase different pendants depending on your outfit and your mood.
You can thrift the chain, of course, but you can also thrift the components of the pendant. I did one here that I’ve been wearing a lot this spring, and today I’m going to show you another one I recently created for the winter wardrobe I’ve been revamping this summer – but surprise, it works great for summer, too!
Click through to see what I made and general guidelines for making your own thrifted/DIY pendant.
STEP 1: Figure out your context
Are you missing a pop of color for your summer wardrobe? Need something with a little bling for going out? Or something classic whose colors will go with most everything in your wardrobe?
An easy way to diagnose this is to conjure up all the times you’ve felt like none of your existing jewelry was working for a particular outfit or type of top/dress, or when your look has felt just a little too plain and needed that extra something to bring it all together. (If you can’t recall these occasions but know they happen, start jotting them down in the moment, either in your phone or a little notepad tucked into your dresser.)
Last winter I realized I didn’t have a great pendant in wintry colors to work with my favorite winter dresses or my trusty turtlenecks. (This gets lost against deeper colors; the tone on this one is too “thin skim milk”/cool; this is more fall; and this is a little dressy for everyday wear.) Bingo – “goes with winter wardrobe” was my context.
STEP 2: Develop Your Inspiration
What elements are going to fill the hole or scratch the itch that’s making you want a new pendant in the first place?
Think about:
- colors that will go with your palette
- materials (glass, wood, ceramic, metal, crystal, rock…) that evoke the feeling you want or that play off your clothing style
- textures that echo or contrast the texture of your clothes,
- size (small/thin for delicate outfits, big/chunky for bolder outfits or ones with lots of solid-color space to fill)
- weight (do you hate anything you can feel hanging on your neck?)
- and level of complexity – sometimes you just want a funky one-note statement and can’t be bothered with piecing several parts together.
Write your preferences down if it helps!
If you already know EXACTLY what you want at this point, you may want to just head to a bead shop or search Etsy for specific pieces. But if you can keep it general at this stage and avoid getting too attached to a detailed set of criteria, you’ll have an easier time finding something you love and you won’t miss the opportunity to be swayed in new directions.
I thought about what wasn’t working in the necklaces above and what I wanted this necklace to be instead – something with cream and gold (staple hues in my winter wardrobe that will show up against darker colors as well), combined with something in a darker shade (taupe? grey?) to ground it and make it pop against my lighter colored sweaters and dresses. I was thinking maybe a one-piece pear-shaped pendant but knew it might take awhile to find the ideal piece so I was open to other possibilities.
STEP 3: Go Hunting!
This is the fun part. Armed with your general inspiration, hit up the jewelry counters at your local thrift shops, keeping your eyes peeled for elements that tick your boxes. Remember, you’re most likely not looking for an already made necklace but for components you can piece together into something you love.
I like to do a once-over, bird’s-eye sweep looking for color families, materials, size, etc. and then go back over with a more focused eye so I don’t miss hidden gems. Don’t overlook the earring or bracelet section as many of these can be deconstructed for usable elements. (Tassel pendants are on trend this summer and you may find great tassels in the earring section since tassel earrings were big a few years ago.)
Always ask the sales people to show you something that piques your interest – handling it up close will tell you more about material, color, and weight and will let you place items side-by-side to see if they’re compatible.
I went hunting at a couple of Goodwill jewelry counters and, over the course of two trips, came home with these beauties for a total of $13 (one’s already cut up because I forgot to take a picture before my creative juices started flowing, whoops!):
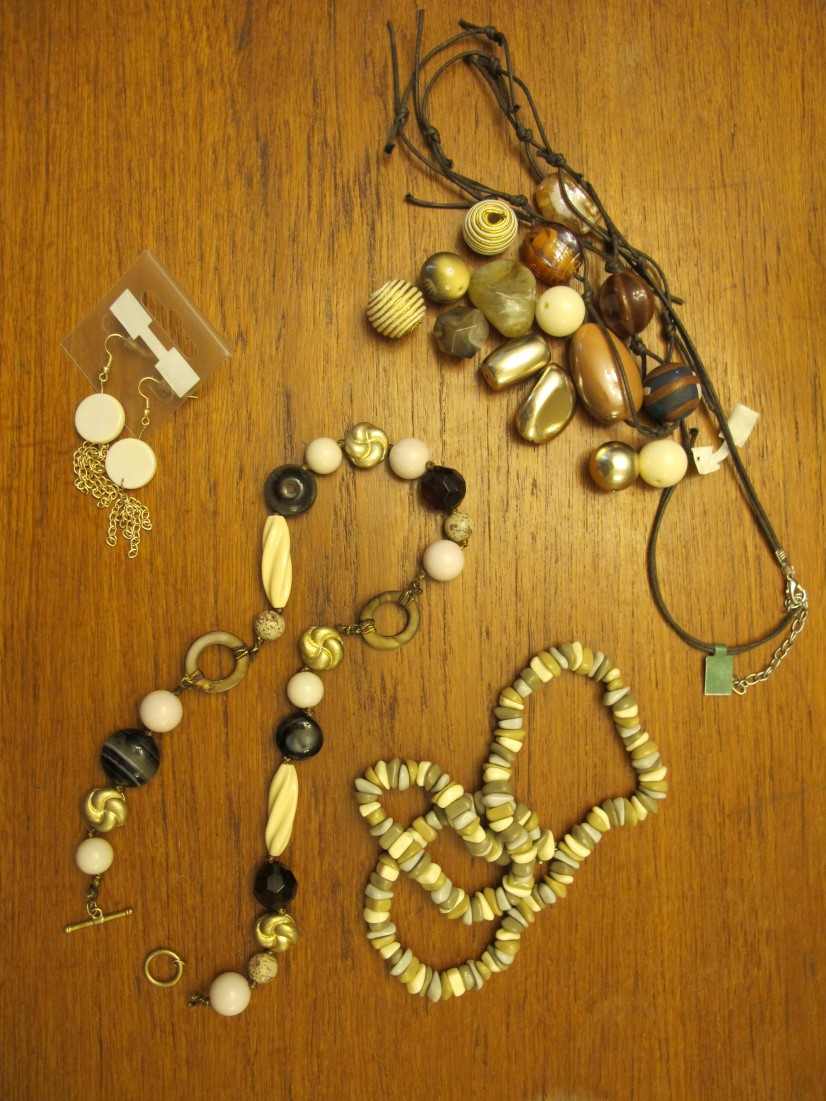
I was particularly drawn to all those loose beads I had liberated from the leather cord necklace (upper left)…. the creams! The cloudy crystal-like numbers! And I was totally in love with the gold, cushion-like flower beads on the gold thread necklace (lower right). Additionally, I knew the tassels on those earrings could be liberated and bunched up to create one big tassel at the bottom of the pendant…
And suddenly I had direction!
STEP 4: Assemble your materials
You’re going to need a basic jewelry-making kit, which you can put together on the cheap at a generic craft store like Michael’s or sometimes even at a big box store like Target. Independent beading stores are worth your support but they will probably be a bit more expensive. (My essentials are described here – also a great starter kit for fixing jewelry you already own.) In particular you’ll need some head pins or eye pins if you’re doing anything more than a one-off pendant so you can string multiple elements together.
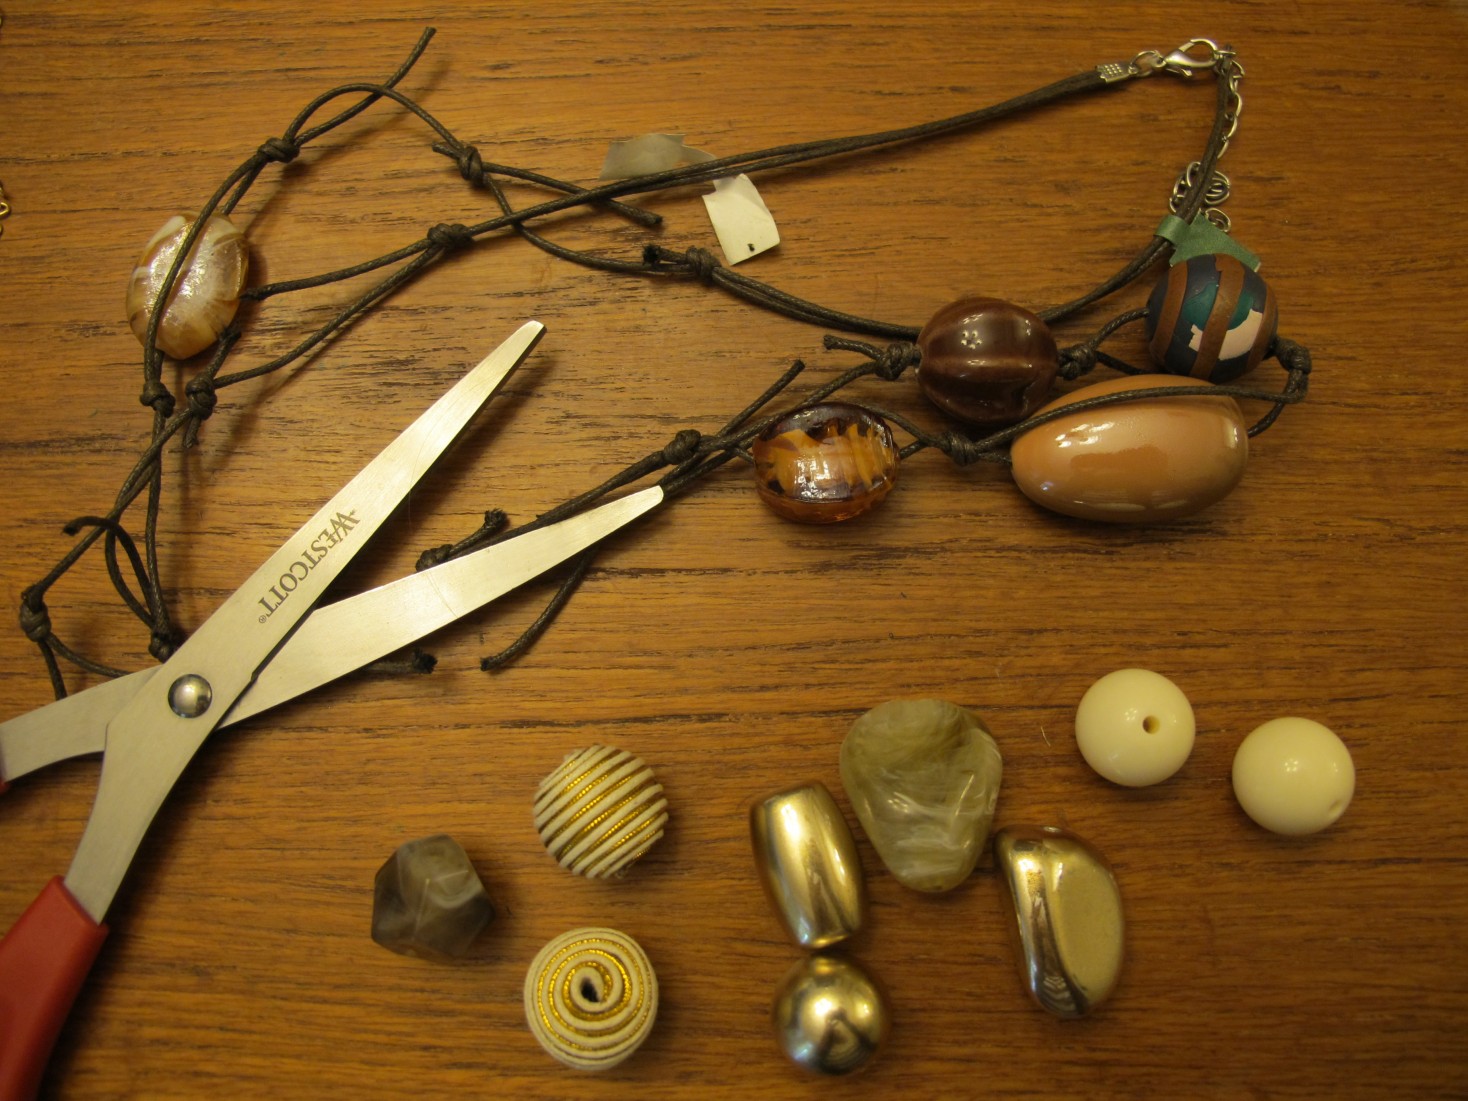
Using your pliers and a pair of scissors, free all the beads/elements you’re drawn to. As in my picture above, it doesn’t matter so much if you’ll end up using them all; you want everything loose and easy to play with so you can mix and match, move them around, etc.
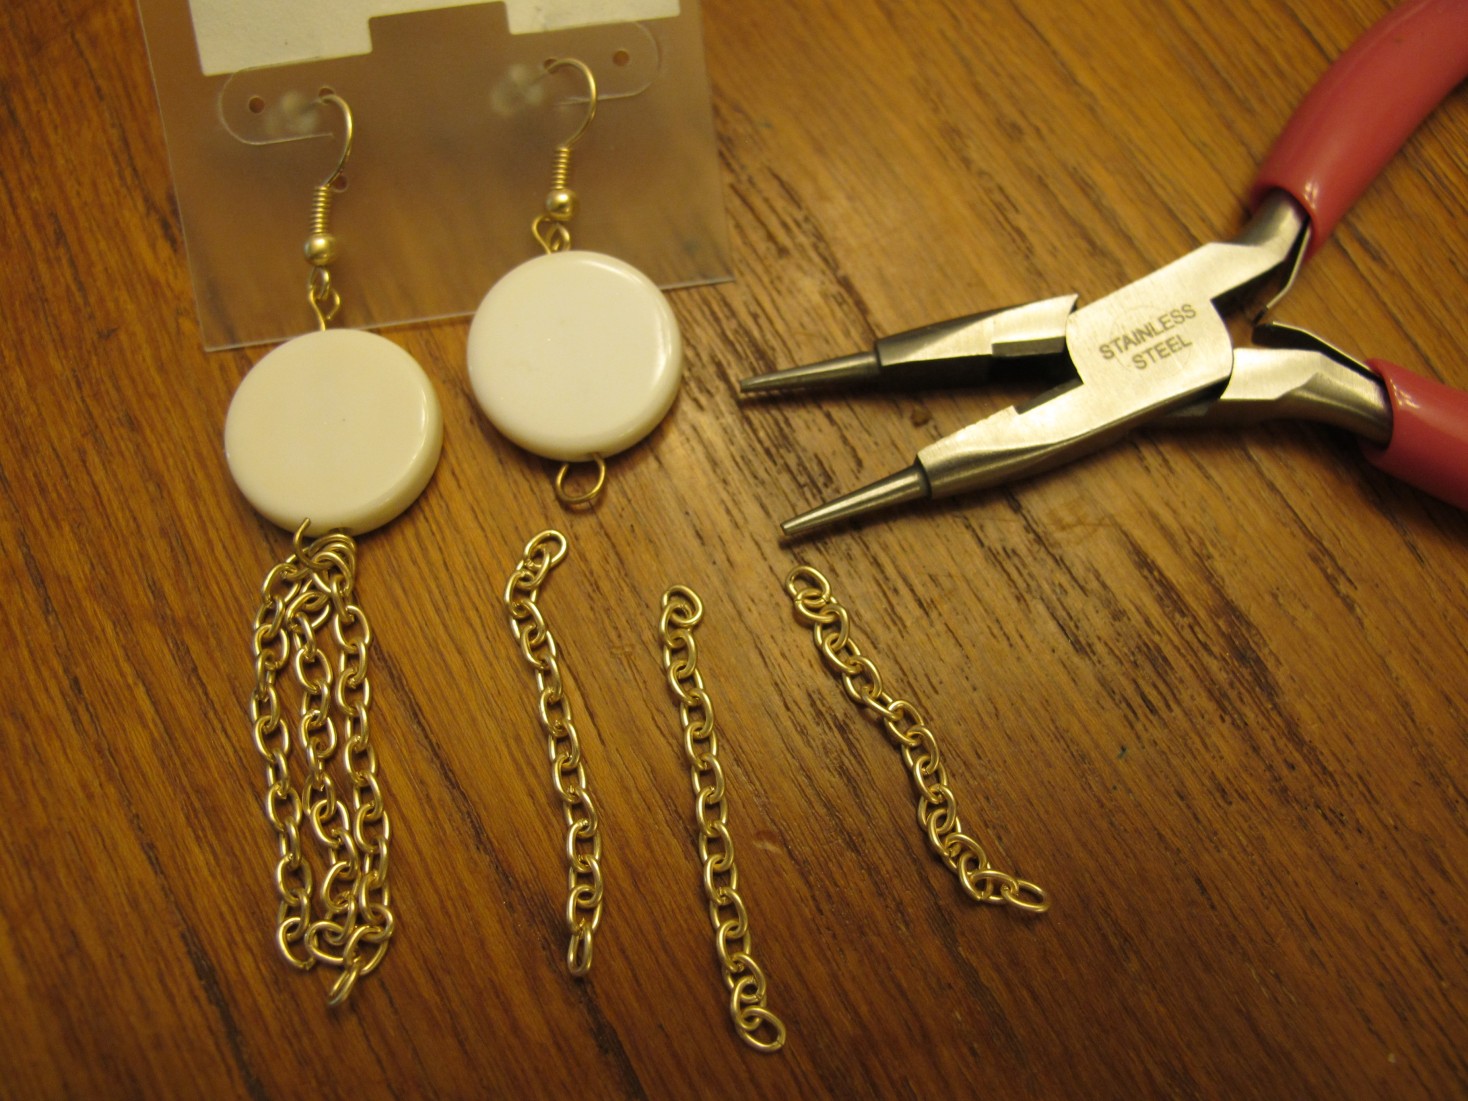
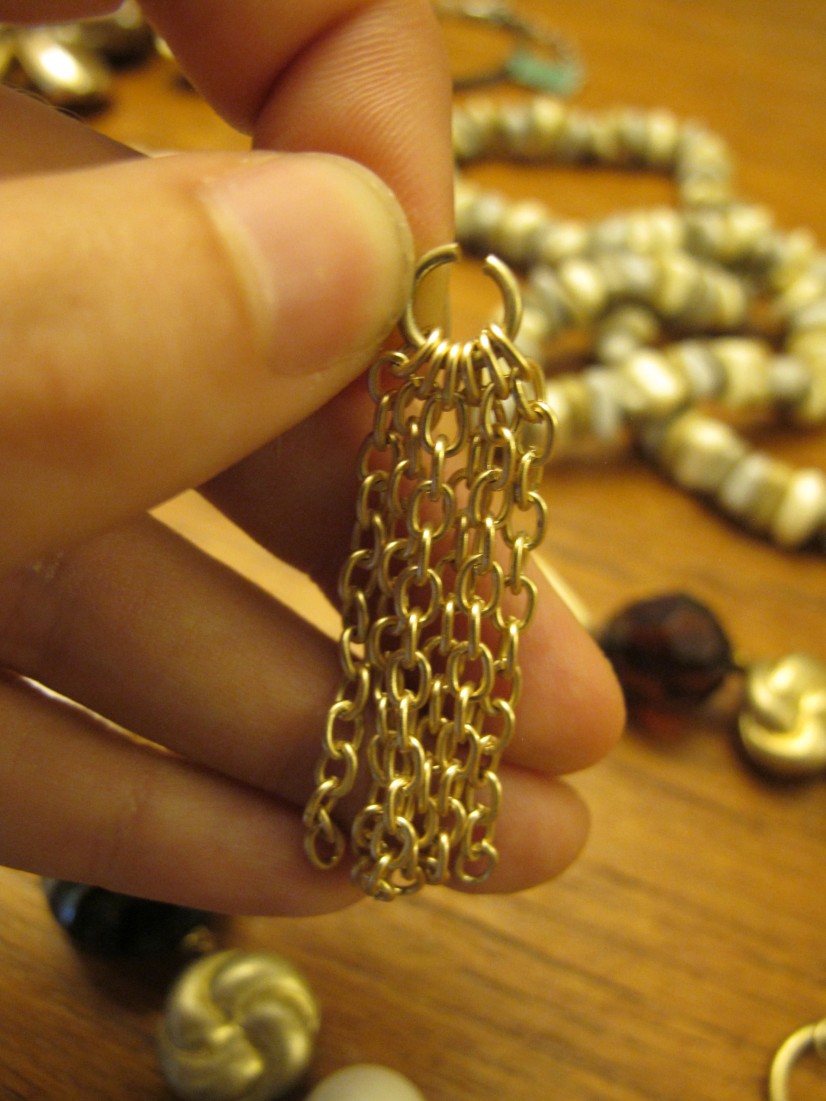
After I cut all those loose beads in the photo above and the gold flowers, I used my bead pliers to liberate the tassels on the earrings (I opened the loop just below the white disk to free all 3 chains at once instead of having to open, then later close, 3 rings on the chains):
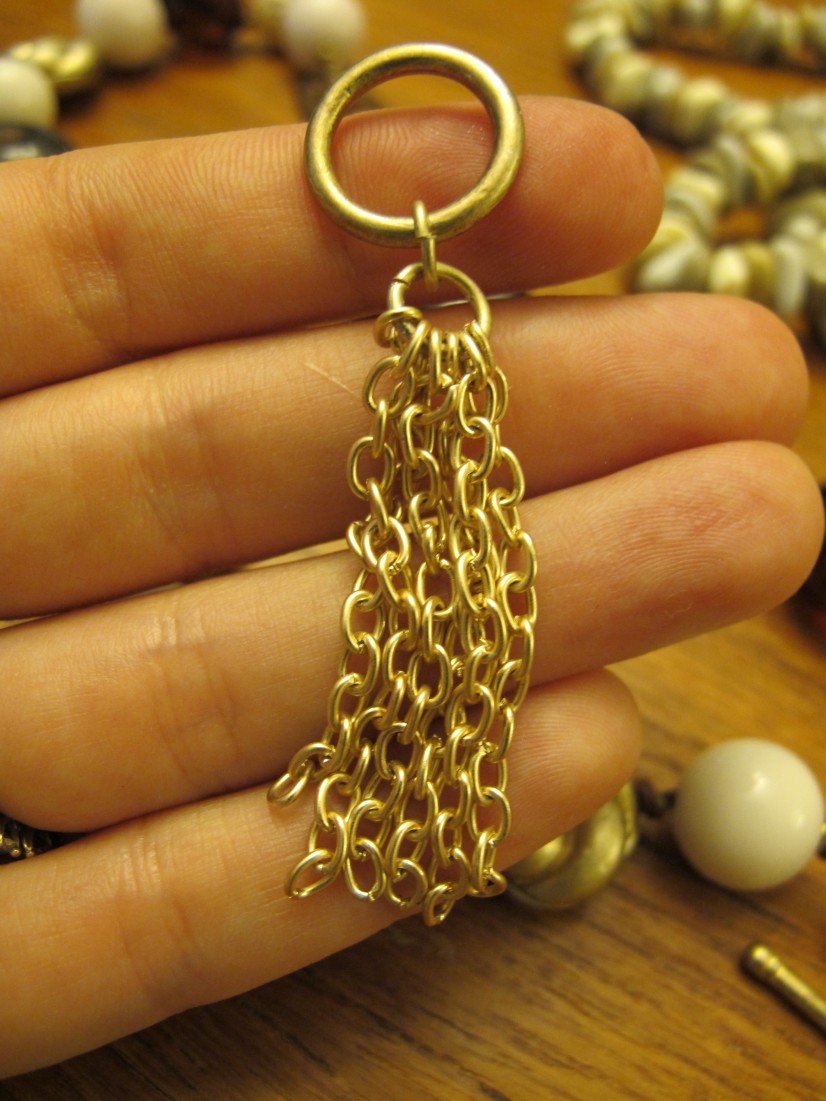
I knew I wanted those chains all in one spot to make my tassel, so next I looked for a loop big enough to hold them all without bunching. Half of the fastening from the cord necklace was a perfect answer with its burnished gold finish and bold circular shape:
So I cut it off, too (middle right above), opened it with my bead pliers, put all the tassels on it, then closed it back up using the same pliers:
STEP 5: Start playing!
This is the other fun part. Try out different combinations of shapes, orders, number of elements, etc. to see what appeals to you. Some possibilities:
- Just one statement piece – a stone, a portrait, ceramic, a crystal, some turquoise, a religious symbol, a circle, a fossil – with or without tiny beads to set it off
- A statement piece with a few beads above or below (like the summer necklace mentioned above)
- Tassel or other vertical piece (horn, feather) by itself
- Tassel/vertical piece plus one or multiple small-ish elements on top (this was my choice – see below)
- Tassel, triangle, or other vertical element under a large statement piece, with another small bead above (it’d be easy to find this leaf pattern in the thrift store’s earring section)
- Multiple beads/stones stacked in ascending order, descending order, or symmetrical order
- One large bead/stone with a few smaller ones above
- Large bead or stone with multiple bunched smaller beads/stones below
- Several pieces the same approximate size, stacked – or with a tassel or vertical piece dangling below
- Multiple pendants (several small, several large, or one large + one or more smaller) hung next to each other
Once I saw those tassel earrings, I knew I wanted a tassel at the bottom. But I still tried out a few different combinations of other elements to see what I liked best.
(As you can see below, I put eye pins on the beads as I went along because I knew which ones I wanted to use. But if you aren’t sure and don’t want to waste eye pins/time, you can just line them up next to each other, adding findings only once you’ve settled on specific beads in a particular order.)
This combo had the flower cushion bead, the creamy white element with the spherical bead, and the tassel, but was missing the darker grounding element:

This had the darker grounding element with the pentagonal bead but was missing the lighter, creamy white element:
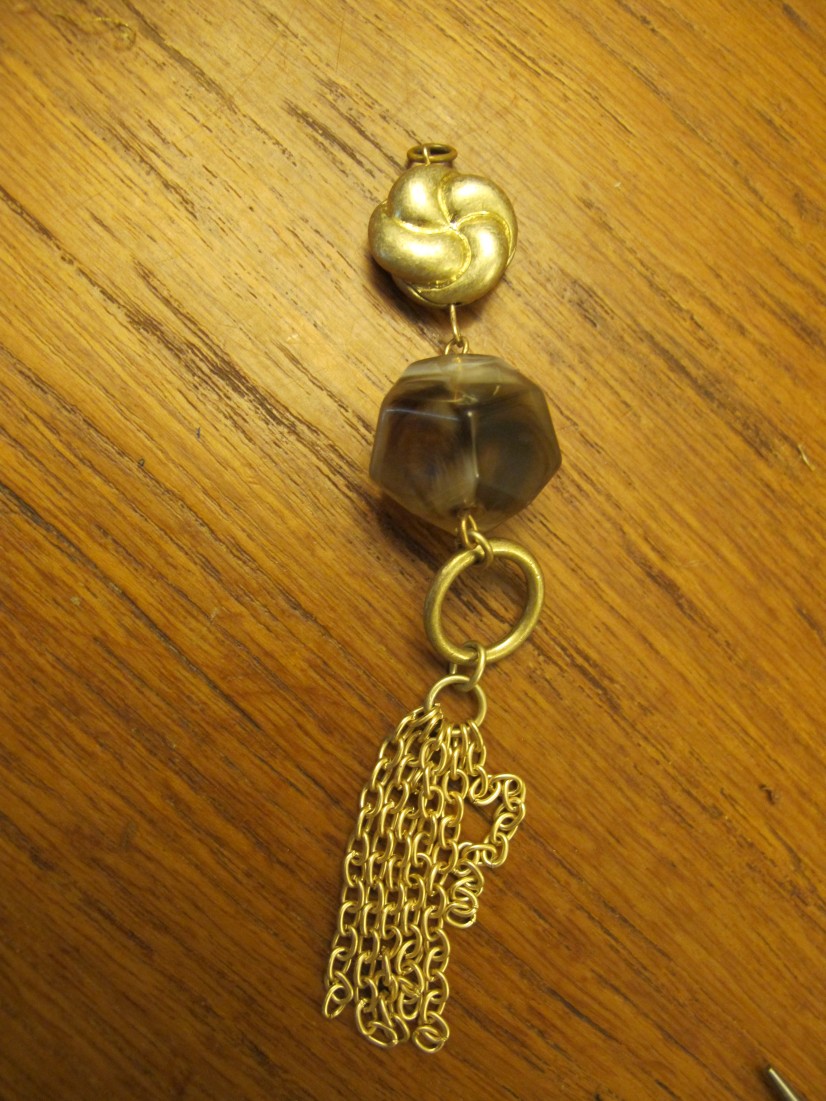
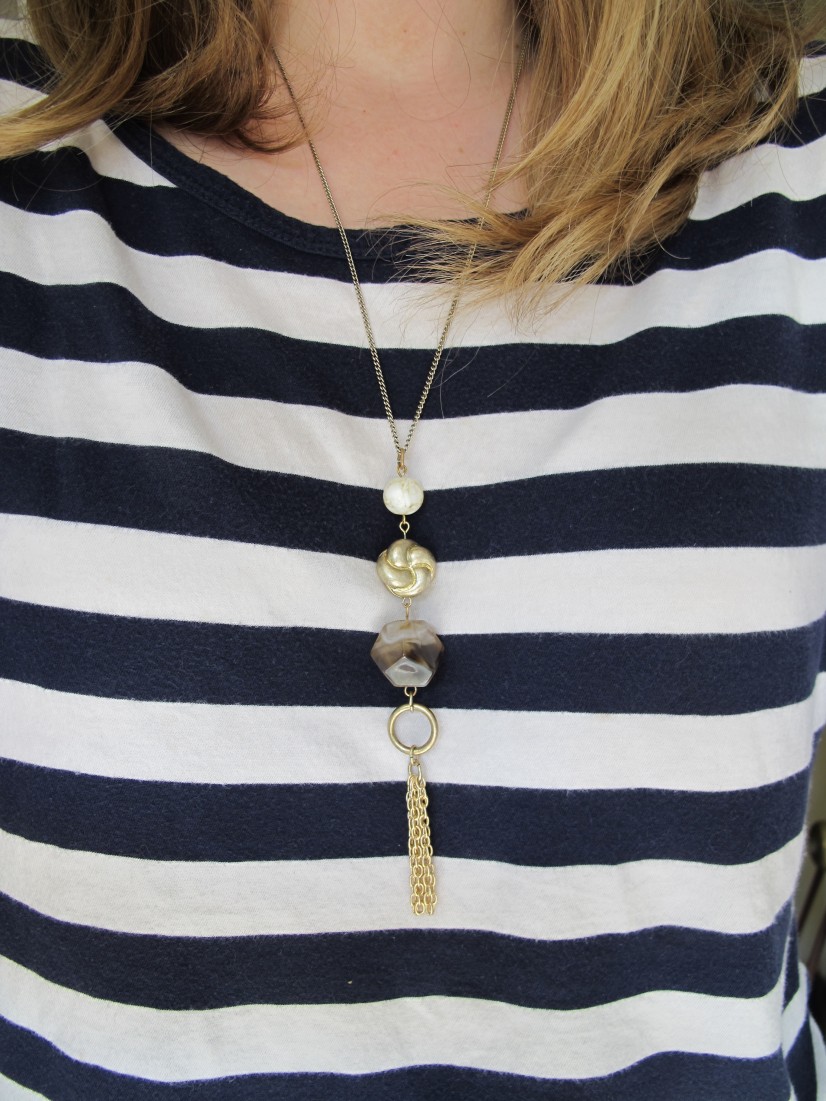
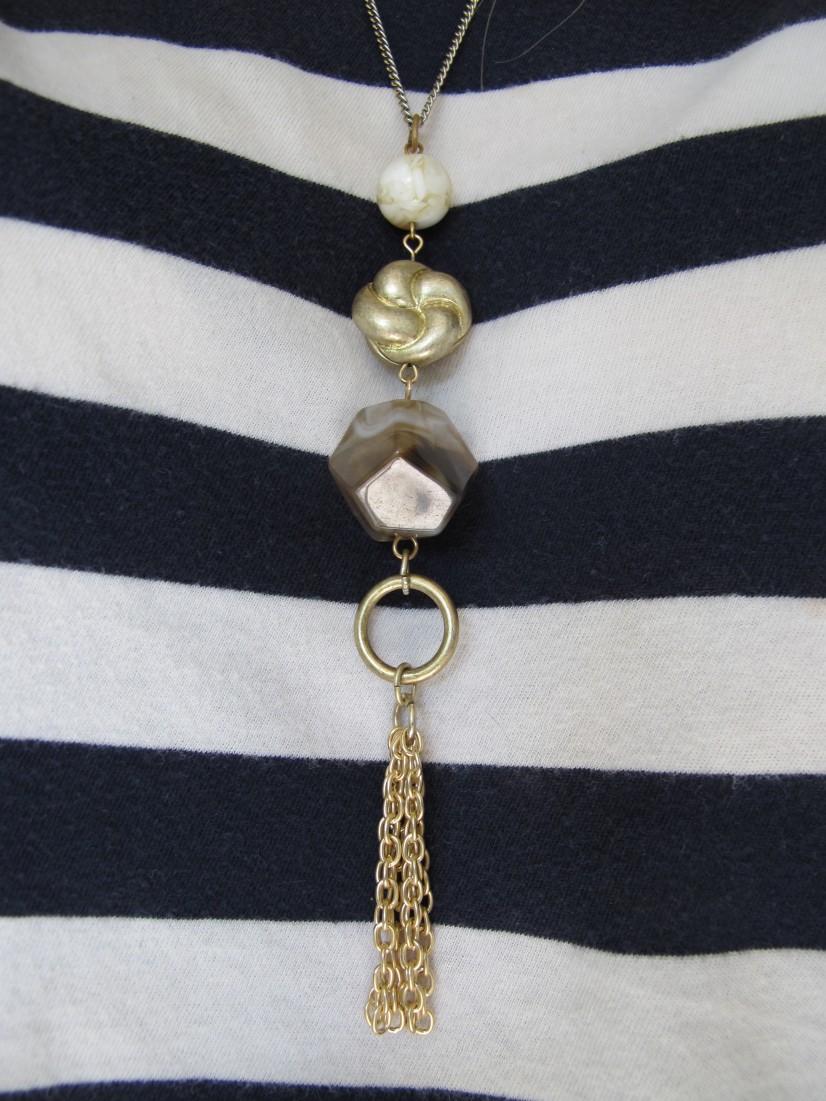
So I combined them:
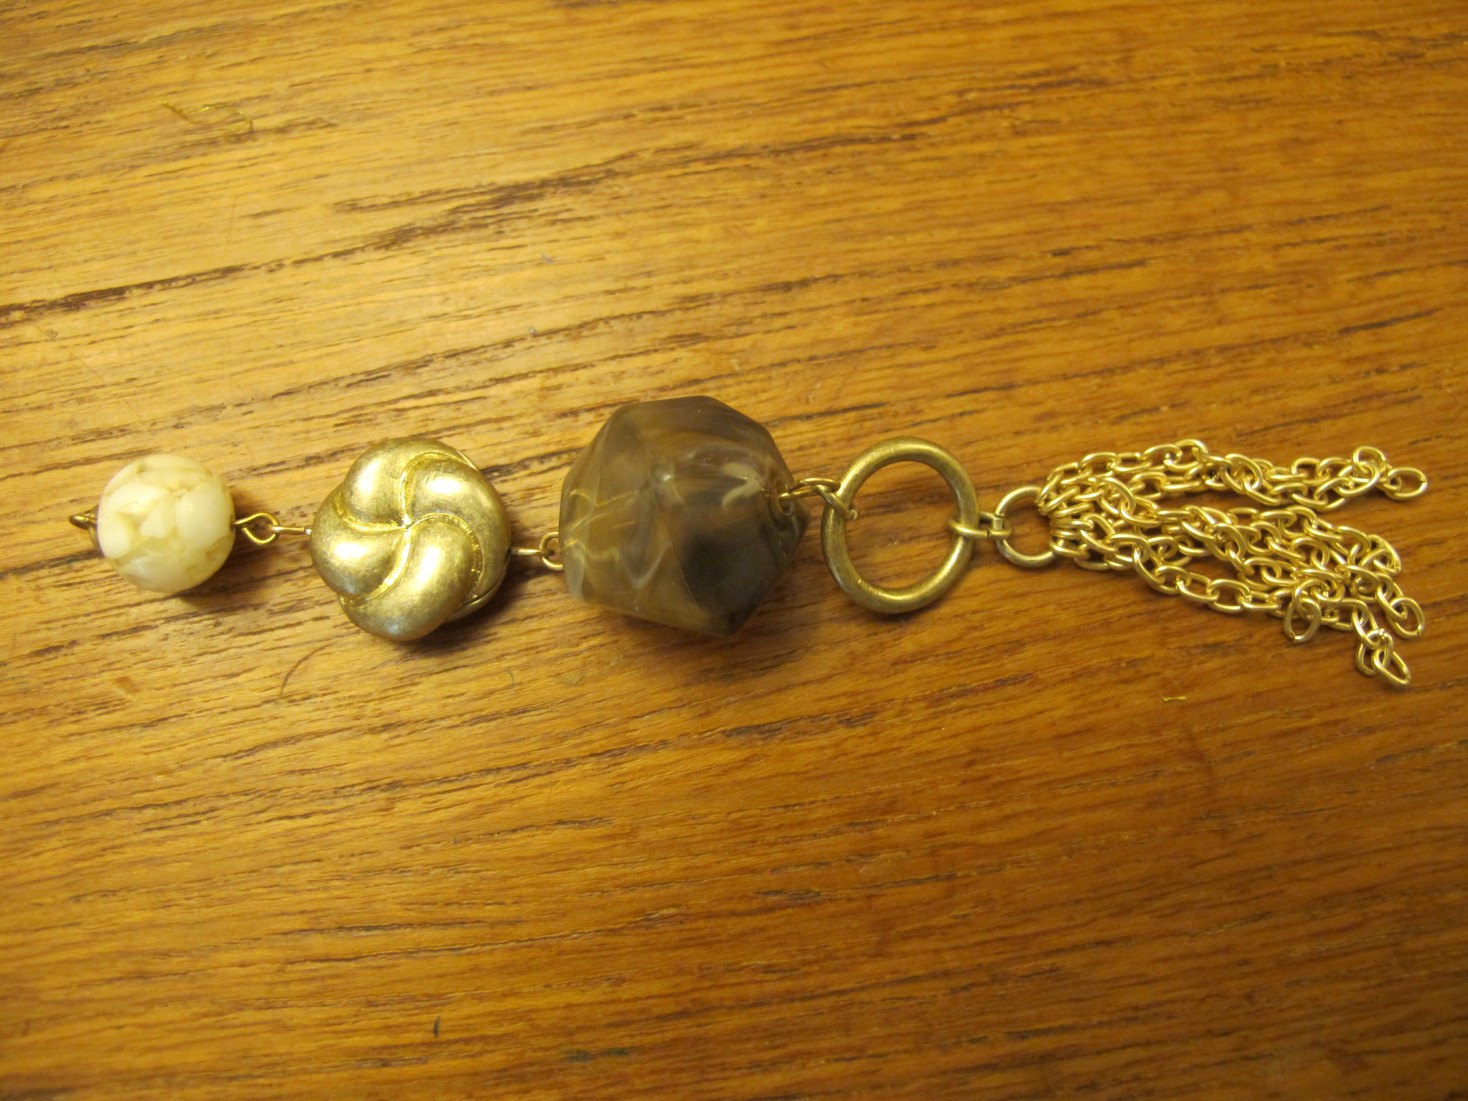
STEP 6: Commit to a finished product
Once you know which beads you want to use in which order, thread an eye pin through each bead and follow these directions to create a loop on the straight end and link the beads together.
Attach a jump ring to the top most loop so that you can thread it easily onto your chain.
And voila!
Have you ever crafted a necklace (or other jewelry) from thrift finds? Share your tips and tricks below!
